You can create a second-level navigation menu on any of your BaseKit web pages and display them in various ways. You will need to follow a few simple steps before you can place your second-level navigation any where you need it.
- Create a new folder to hold your secondary navigation.
- Add new pages to the newly created folder as needed.
Add a Sub-Navigation Menu
Once you have created a folder and some pages, you can easily create a sub-navigation widget wherever you like. In the Widgets panel, click the Content menu to expand it.
- Drag and drop a Navigation widget to any of the pages where the sub-folder should be accessible.
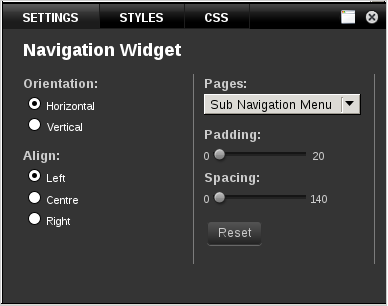
- Double-click on the widget; or single click and then click the gear icon.
- In the settings drawer at the bottom of the screen, select the folder you created as the source of the menu items.
You can now create a sub-navigation menu anywhere on your site by repeating these steps.
Customize the Sub-Navigation Menu
There are also plenty of other ways to customize your navigation menus, even making third-level navigation or further if your site requires it. You can also change the way your navigation menus look and behave.

When you double-click on the navigation widget, you will be presented with a settings drawer at the bottom of the page. From this drawer you can customize several features of your navigation menu.
- Orientation - Allows you to change the orientation of the links in the navigation widget
- Align - Allows you to change the alignment of your menu items
- Padding - Allows you to define an area of whitespace around the entire widget
- Spacing - Allows you to define how much space exists between each menu item
- Reset - Resets settings to their defaults

